Deploy Custom PyTorch Model on Mobile App with PlayTorch
In this blog, I am going to show how to deploy a PyTorch Custom model on the Mobile Devices(iOS/android) with help of ecosystem of PlayTorch and Sanck Expo. This can be a very quick way of prototyping a mobile application for the demo purposes. It can be used later for going in production as well.
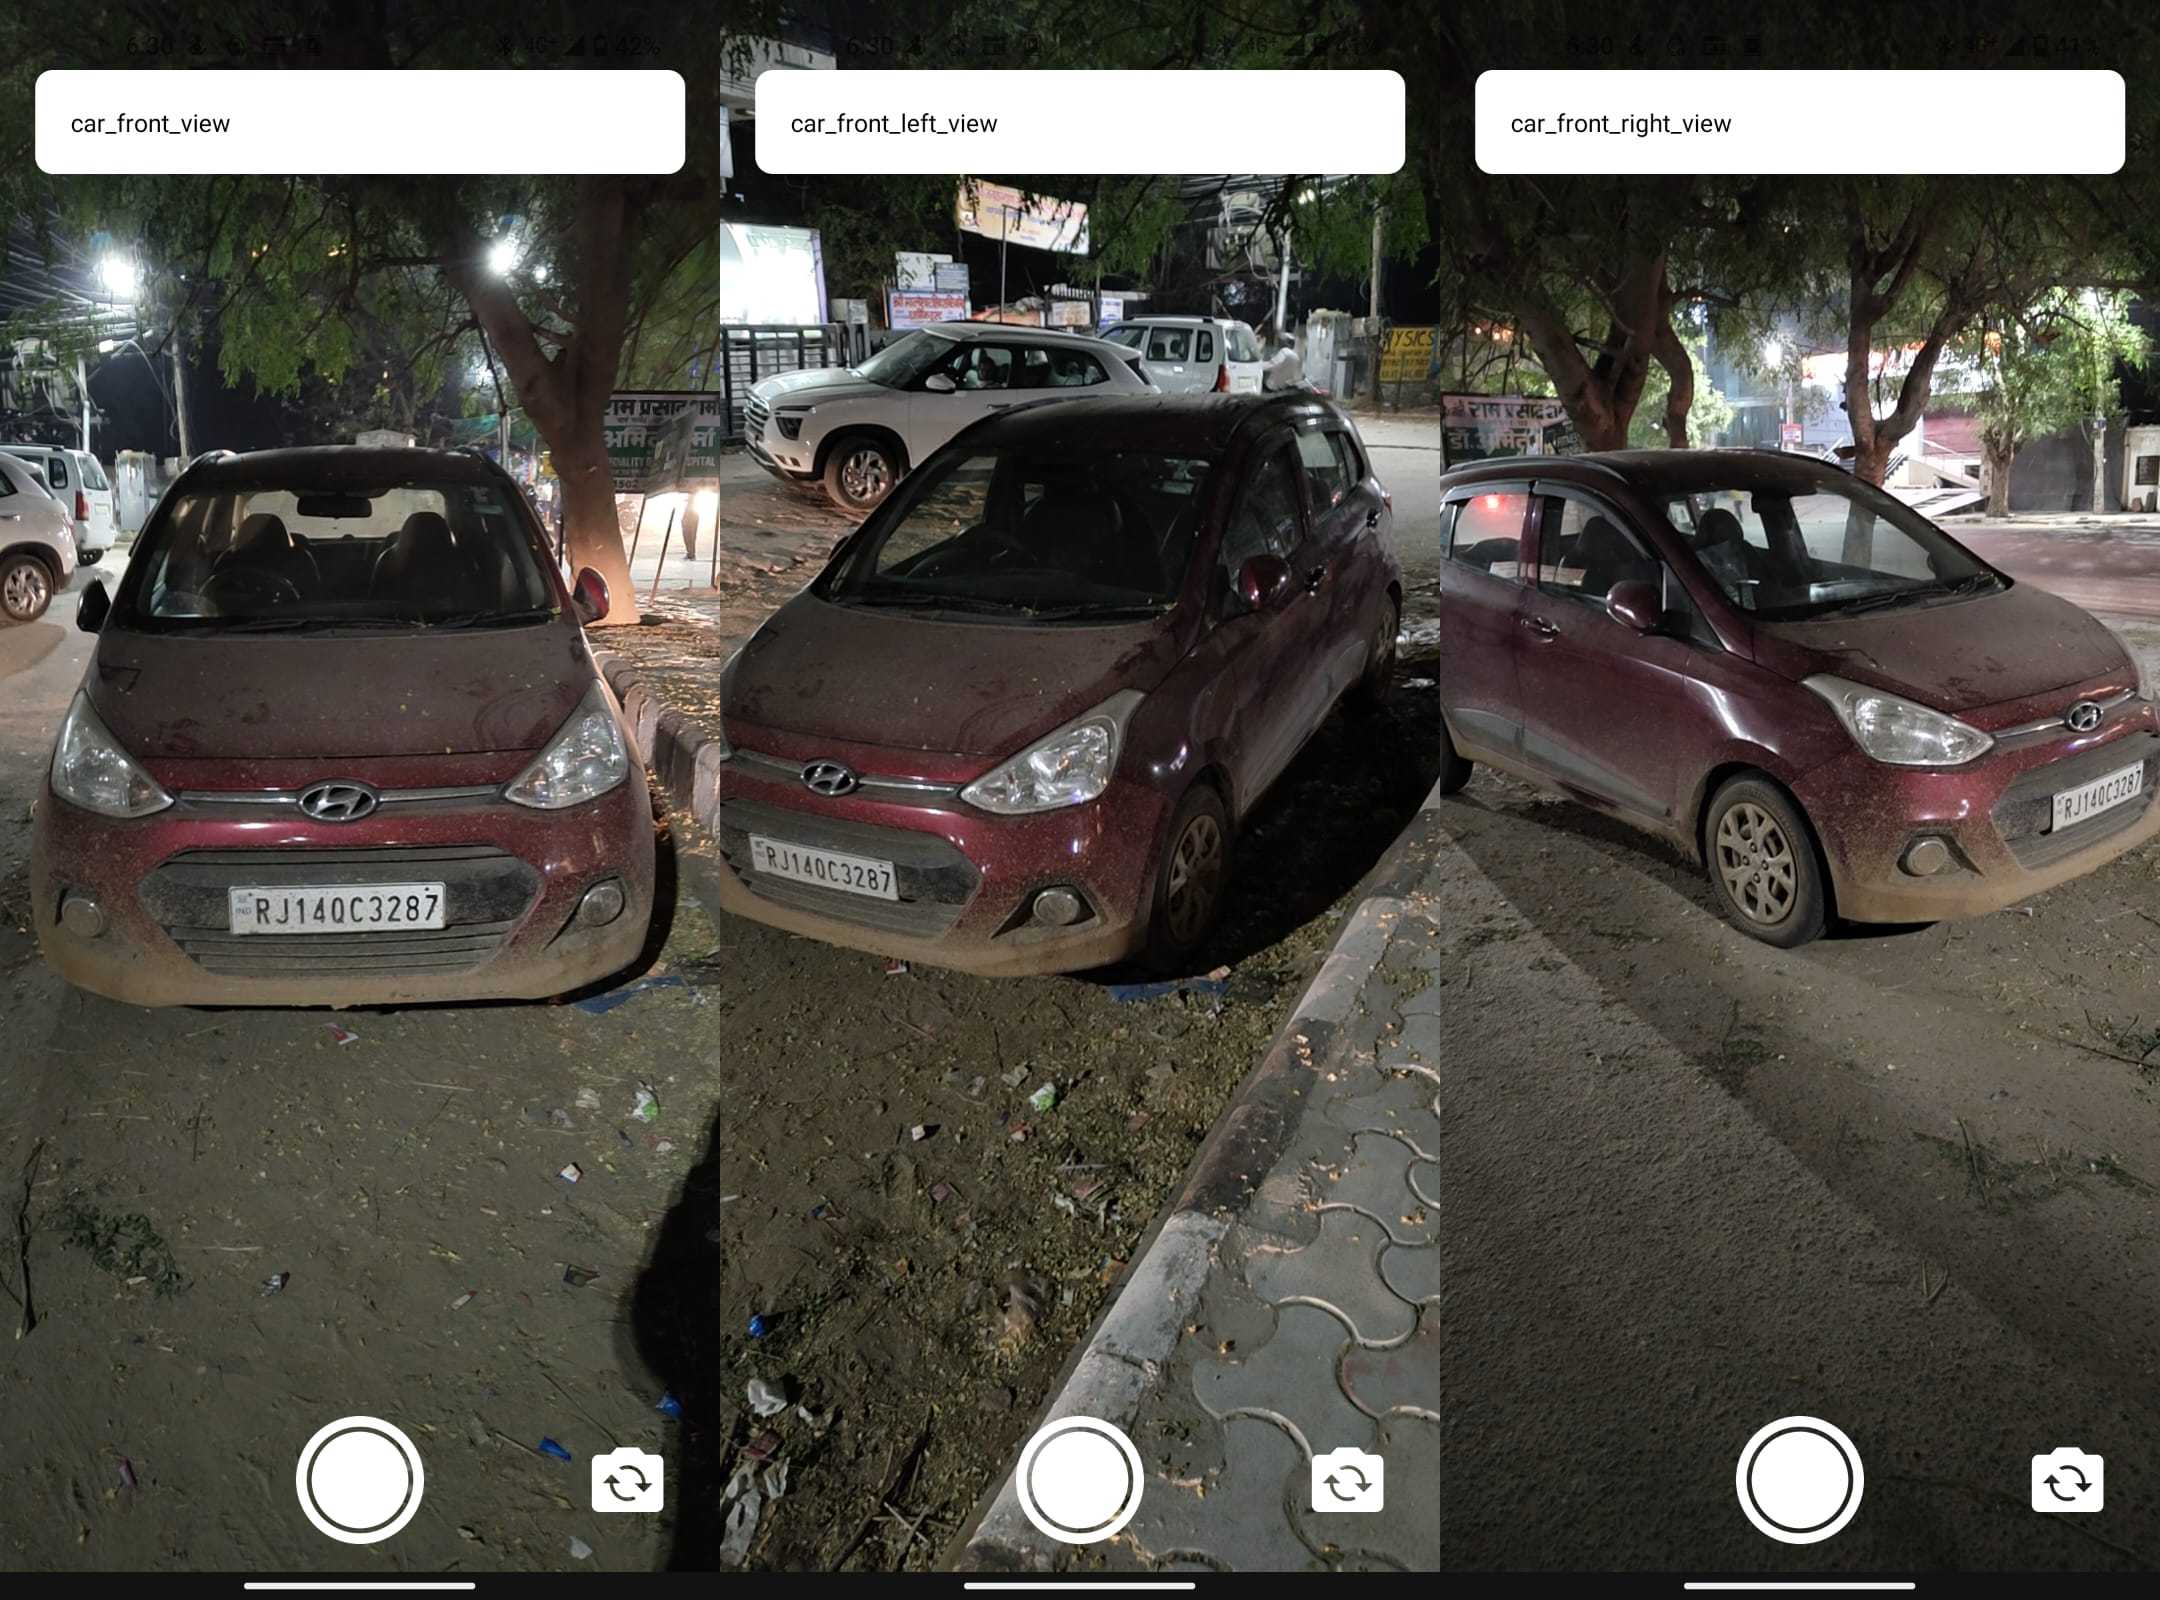
I am going to build a car view calssification model for this blog which will infer if the picture taken of the car is - Front View, Front Left view or Front Right view. The outcome will be something like this image.
Project GitHub Link: https://github.com/shashank2806/playtorch-demo
This Blog is is divided in 5 parts:
- Creating custom PyTorch Model
- Optimizing the model for Mobile Devices.
- Getting started with PlayTorch and Sanck Expo.
- Integrating the model in React Native.
- Testing the Model in Mobile Device.
Prerequisites: 1. Basic knowledge of model training in PyTorch.
Step 1 : Creating custom PyTorch Model.
If you already have a trainied classification model, you can skip this step. I am going to train a model for car view classification. For this I will scapre the data from the internet, around 80 images of each class. I will train a MobileNet model. Refer to GitHub Repository for Training Notebook and Training Images.
Dataset
As mentioned earlier. I have used internet to scrape the data. I used CygnusX1 for downloading the dataset from the google. In the dataset I kept
217images in training and21images in validation. Clasess arecar_front_view,car_front_left_view,car_front_right_view.Model Training
As I am creating this model from scratch. I am going to train it on
MobileNet_v3Architecture. If you have a model trained onResNetor other architecture, that is fine too. After training for 25 epochs, it achieved accuracy of ~90%. test the model on few images and save it.torch.save(model_ft, 'view_model_mobile.pt')
Step 2 : Optimizing the model for Mobile Devices.
After the model is trainied, one essential step before model can be used in iOS/Android apps is to convert the Python-dependent model to TrochScript, which can then further be optimized for mobile apps. Conversion to TorchScript can be as simple as a single call, or as complicated as changing the original model in many different places.
In our case we can just convert it with a single call. For complex model refer this Pytorch doc
Load the model saved in last step. Convert the model model to TorchScipt and then optimize it for mobile device with just few lines of code.
import torch
import torchvision
from torch.utils.mobile_optimizer import optimize_for_mobile

model = torch.load('view_model_mobile.pt')
model.eval()
example = torch.rand(1, 3, 224, 224)
scripted_model = torch.jit.script(model, example)
optimized_model = optimize_for_mobile(scripted_model)
optimized_model._save_for_lite_interpreter("view_model_mobile.ptl")
Now the model is optimized for mobile devices. It is saved as view_model_mobile.ptl. This is the model we will be using for inference on Mobile device.
Now we are ready for the next step - Creating the App.
Step 3: Getting started with PlayTorch and Sanck Expo
PlayTorch is Framework for rapidly creating mobile AI Apps. It has a React Native Package to run on-device inference. There are multiple App templates and we just need to replace the model weights and metadata to tailor app to our needs
To get started with PlayTorch. Download the PlayTorch App and go through this simple get-started guide. Create your Hello World App. It will not take maore than 10 minutes!
PlayTorch uses Sanck Expo for code development. Snack Expo is a Cloud IDE for developing React Native Apps. It saves us from hassle of setting up the development environment on our on machine. It also saves us form the hassle of paring of the Andriod device for development. You can just san a QR Code on the IDE and run the code in the PlayTorch App. The development experience is very hassle-free. You save a lot of time. This is what is like about PlayTorch - comparing to other methods(Java)
I hope you guys now have fimiliarity with PlayTorch and Snack Expo and you have created you Hello World! App. Let’s move forward.
Step 4: Integrating the model in React Native.
We have the Model ready. We now also understand the PlayTorch Ecosystem. Let’s integarte our trainied model to React Code on Sanck Expo.
Link to my final code: https://github.com/shashank2806/playtorch-demo/tree/master/car-view-react-app
Folder strucure React Native Code:
1. `App.js`: Main file for importing other modules and files, Script for app layout, camera and style is present here.
2. `imageClassifier.js`: Model loading and images transforms/preprocessing are presnet here.
3. `ImageNetClasses.json`: Your output lables are listed here.
4. `package.json`: Contains required packages.
You need to change MODEL_URL in imageClassifier.js. Put the url to your tarined model.
// 3. URL to the image classification model.
const MODEL_URL = 'https://github.com/shashank2806/playtorch-demo/raw/master/view_model_mobile.ptl';
You also need to change the ImageNetClasses.json. Put your lables here, In my case it were.
[
    "car_front_left_view",
    "car_front_right_view",
    "car_front_view"
]
If you have done all this steps correctly, you should now see a working demo on your mobile device.
Step 5: Testing the Model in Mobile Device.
Now you can test demo with on your mobile device. Share it with others as well. You can view my demo with this URL https://playtorch.dev/snack/@shashank2806/car-view.
I tested it on my Mobile. Even though the dataset it was trained on was Artifical. It is working very accurate on real-world images as well.